
 Facebook Live Beer Budget Broadcasting takes a look at live streaming video via Facebook Live. If you’ve worked with computer video capture for a while, you can appreciate the changes over the years. Some of the mantra hasn’t changed a bit. More CPU, more RAM, more graphics, and you know the rest of the drill. For this exercise, were going to look at whats possible with budget equipment for live streaming. More specifically Facebook, although the same techniques can be applied to the other streaming services. I’ll be detailing the equipment used and setup of 2 popular broadcast programs. Also a somewhat brutal look at hardware solutions. Let’s get too it.
ABOUT FACEBOOK LIVE
Comparatively speaking, Facebook Live is a relatively new entry to a growing number of live streaming services. As such, it’s always in a state of flux, much like Facebook itself. The advantages are that it’s simple to use and share the content you provide. Plus, it’s free (for now). So, if you’re just getting your feet wet in this medium, it’s a good place to start.
Hardware
Let’s take a look at the hardware first. Bear in mind this article is aimed at mid tier business users and not “leet gamers”. With that in mind we’ll tackle the computer first. You can always retreat without spending a dime.
Computer
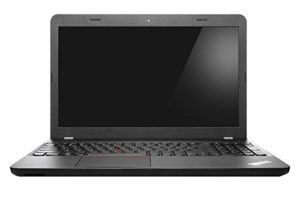 The host computer is a Lenovo thinkpad E555 15.6″ Dual Core Laptop fitting the category of basic business and personal laptop. A budget system available with Windows 7 installed, the system RAM was upgraded to 8 Gb. For a laptop, this would be considered a bare minimum for live streaming. The latest AMD Radeon graphics drivers available from Lenovo need to be installed, as well as Windows 7 Service Pack 2. Having Google Chrome with the and setting up Facebook Live is also highly recommended for testing.
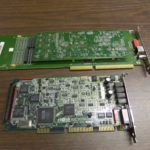
Encoder
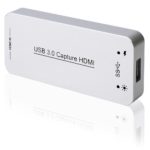 The basic setup is a two camera switchable system incorporating the laptops internal webcam for narration and an external camera for the actual scene. This required an external HDMI to USB encoder. There are a host of these available, but most of the mid tier ones tend to be either poorly spec’d or misleading. After one bad purchase and some more shopping I settled on a Digitnow BR139 model which worked well with the existing computer hardware. Works well with plain Facebook Live as well as Open Broadcaster and Wirecast. Can’t crank HD out of this setup, but a new computer won’t require upgrading all the hardware.
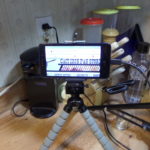
External Camera
 The camera picked out was probably the most difficult shop for. The intended goal was to use the internal webcam for narration and the second camera for the subject. Not an unusual scenario. Here is what was shopped for:
- Liteweight for a small tripod.
- HDMI and composite video outputs
- Active audio and video in preview mode
- External microphone input
- Wide angle lens attachment
- Rotatable viewfinder
The audio was probably the most important as some of the still shot cameras lacked in quality and the audio out wasn’t active until the camera was in record mode. So, the one settled upon was a Cannon Vixia HF R72 camcorder. In addition, a Wide Angle Lens kit was purchased for shooting in tight quarters. And to round out the connectivity a 3.5 mm camcorder cable for the standard A/V output. Lot’s of wireless options available for this camcorder, although the user manual is tough to wade through.
PUTTING IT ALL TOGETHER
 Facebook Live is fairly simple to use if you’re using the Chrome browser. Using a program such as Open Broadcaster, Wirecast, or XSplit may require some extra tweaking, so it’s a good idea to do some testing first. The easiest way to do that is from a Facebook page by hitting the Live Video button. This will bring up a preview window and a sidebar. Select the camera you want to use, add a description, and hit the GO Live button. Make a short test recording with each camera you have installed, and download the videos. Right click the downloaded videos and click properties to bring up the videos property sheet.
Keep in mind this is a benchmark test, but the numbers will come in handy when you’re trying to get other software tweaked. Critique the videos for skips, jerkiness, and overall quality. Make sure you have good lighting and try to do it early in the morning before the rest of the Granny Channels inhabitants get out of bed. Moreover, if you’re having streaming issues, now’s the time to resolve them.
So now you should be able to live broadcast with each camera with the best results Facebook Live and your equipment will give you. In part 2 of Facebook Live Beer Budget Broacasting, we’ll delve into some technical aspects of Facebook Live and some cool software for kicking your presentations up. Stay Tuned.
Recent Comments